Drawing a Dotted Lined Circle in Gimp
GIMP Depict Circle
GIMP is a fascinating software for editing images and other graphical tasks. But, it does not support whatsoever directly tool for cartoon a circle. Drawing a circle is an essential job for any graphics tool. But, we tin can draw a circumvolve in GIMP without installing any external tool or plugin. It is a directly forward procedure.
We tin can perform several tasks on a circumvolve like create a vector circle, colored circle, add together a border to circle, stroke the outline of the circumvolve, and many more tasks in GIMP.
The Ellipse selection tool allows us to create a circle or ellipse.
let'due south understand how to create a solid circle in GIMP:
How To Describe a Circle in GIMP
We tin draw a circle using the ellipse select tool. It is a direct forward process. Follow the below steps to draw a circle:
Step1: Create a new epitome
The first step is to depict a circle is creating a new image. To create a new paradigm, select the New pick from the file menu. It will create a new bare image; we can choose whether it should exist filled with background color or transparent. It volition open a dialog window for specifying the image properties.
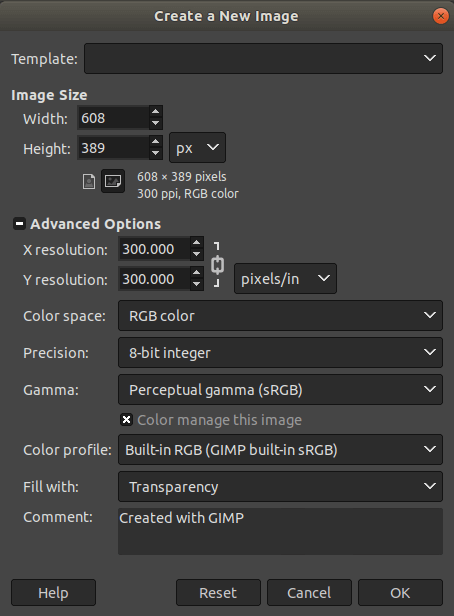
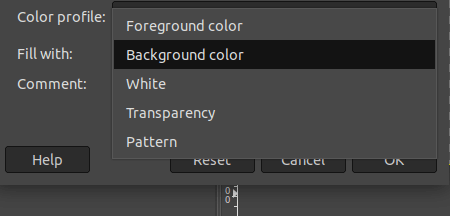
Specify the prototype resolution and other properties such equally color profile, fill with, etc. There is five fill option available in GIMP. Nosotros can choose one of the post-obit as per our need:
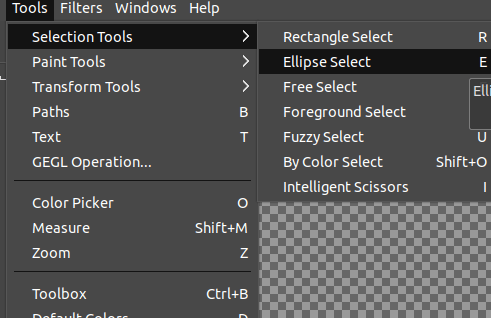
Step2: Select the Ellipse Select tool
afterwards creating an prototype, we have to choose a ellipse select tool for drawing the circle. To select the ellipse select tool, navigate to Tools-> Selection Tools-> and select Ellipse Select option, or nosotros can press the E key.
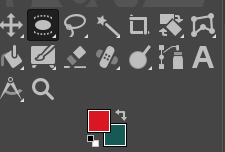
We tin can also select the ellipse select tool from the toolbox by clicking on the below icon:
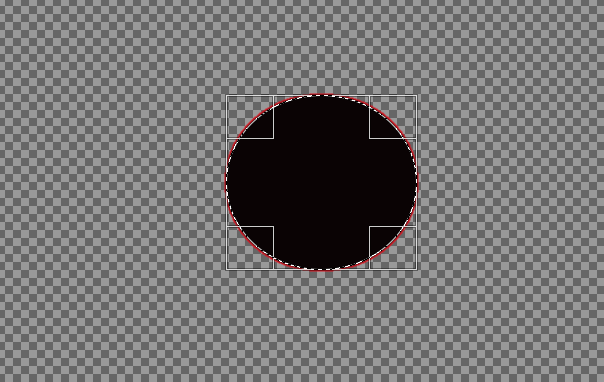
Step3: Start Drawing
Now, click anywhere on the image and start drawing the circle. To draw a circle, click at a point and drag it to another betoken as the circle'southward required size and clarity. It will look something similar this:
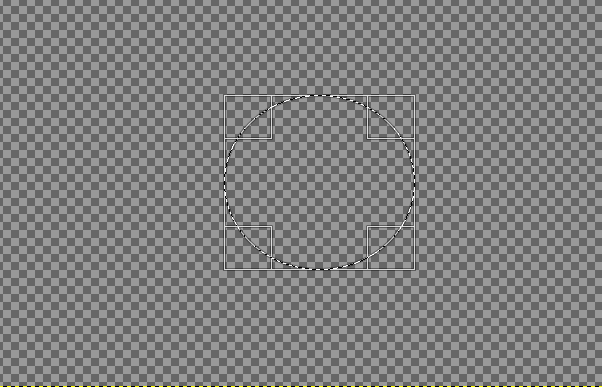
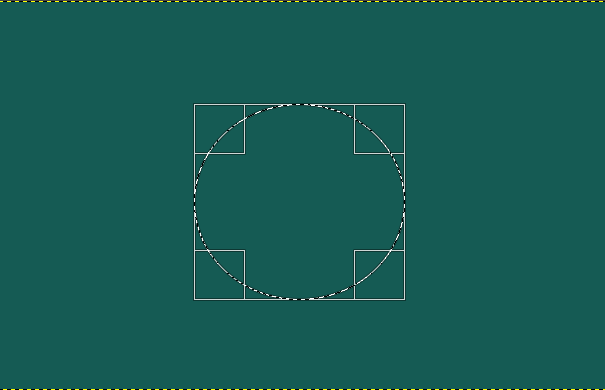
Equally i have chosen a transparent groundwork, so it is looking like in a higher place. If we have created an paradigm filled with background or foreground color, it will look like the following:
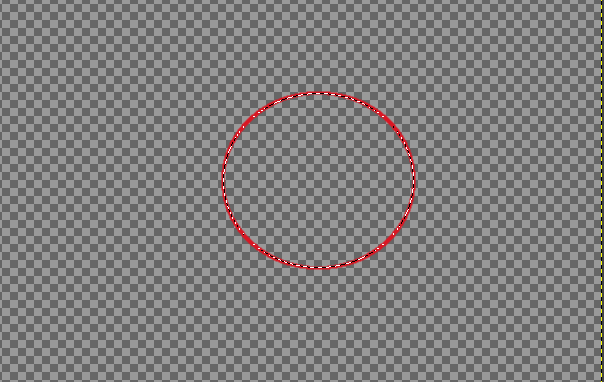
Step4: Stroke the outline
At present, stroke the borders to make it solid. To stroke the outline, select the Stroke Selection option from the Edit menu. It volition open a dialog window for asking the stroke backdrop, such as line width.
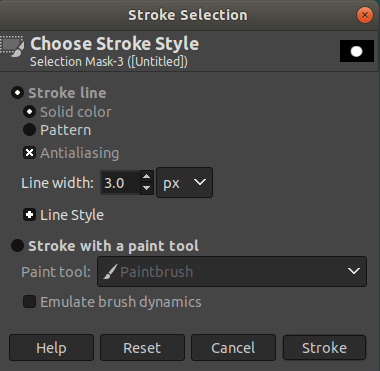
Define backdrop and click on the stroke push to create an outline on the edges of the circumvolve.
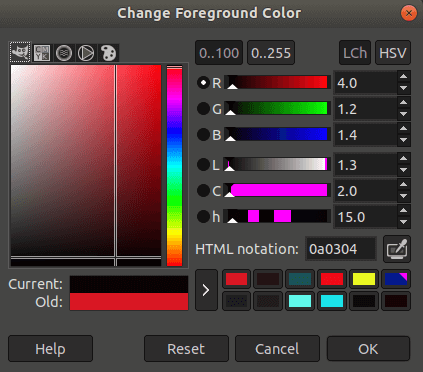
Step5: Specify the Color
To fill up the circle with a color, select the color and fill it with background and foreground colour. To fill colour, select the colour from the color icon given at the below of the toolbox.

Click on the color box to change the color. It will open up a dialog window having available color. Select the required color:
Step6: Fill the Colour
To make full with the foreground color, press the "CTRL+ Comma(,)" keys and for the background color, press the "CTRL+ Dot(.)" keys. Information technology will fill the active color.
Step7: Save the image
To save the image, select the Export As pick from the file menu. Information technology volition save the epitome to the specified location. The final paradigm will look like equally follows:

The paradigm having colored background looks like as follows:

We can crop or scale the image according to our requirement using the scale and crop options from the Epitome and Tools bill of fare.
How to Create an Bodily Circumvolve
sometimes, we cannot create an actual circle, peculiarly in the example of the beginner. Because the Ellipse select tool starts cartoon the ellipse, nosotros take to adjust information technology past our mouse.
If we are non then practiced at drawing, nosotros tin can draw the accurate circle by holding downward the SHIFT and ALT keys and dragging the mouse. It volition create an actual circumvolve.
Similarly, we can create an ellipse using the ellipse select tool. It is a useful tool for logo designing. More often than not for designing the logo, we may require to create an ellipse or circle or maybe both. Below is the example of drawing ellipse and circumvolve both mix art:

berrickbressibity.blogspot.com
Source: https://www.javatpoint.com/gimp-draw-circle